AviPLAN Airside Pro 2024 Help
Note: The following applies when Stop line creation is set to User-defined and Airplane positioning is set to User-defined (i.e. Automatic is switched off). See Airplane Parking.
Using this mode of operation,
Use the ![]() Add stop line with Airplanes or
Add stop line with Airplanes or ![]() Add stop line button above the Airplane Parking table to add a stop line with or without airplanes (click the small arrow on the right side of the button to make this selection).
Add stop line button above the Airplane Parking table to add a stop line with or without airplanes (click the small arrow on the right side of the button to make this selection).
After clicking, the stop line will become visible in the drawing. After the location of the stop line is confirmed, an additional tab will be added to the Airplane Parking table.
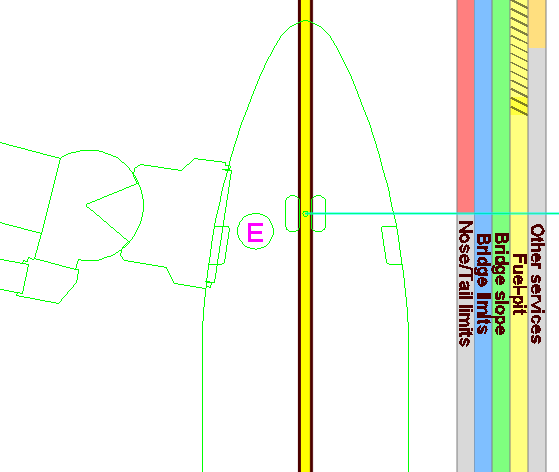
Once one or more airplanes have been selected using the Select Object dialog, the airplane(s) together with the connected bridge and stop line are visible in the drawing. In addition to these objects, a number of colored indicators will be displayed in the drawing, parallel to the lead-in line, to provide assistance in placing the stop line and airplane correctly. The indicators are:
After the location of the stop line is confirmed, an additional Stop line tab will be added to the Airplane Parking table and the grid will be populated with data.
Lists all airplanes that have been added to the session.
Specific actions that can be performed for an individual airplane or multiple selection of airplanes are:
This tab displays comments related to any errors or warnings that have been identified (those airplanes displaying a red or yellow circle icon in the Airplane Parking table), for example if a door is outside of the bridge's envelope or bridge slope is approaching the maximum allowable limit.
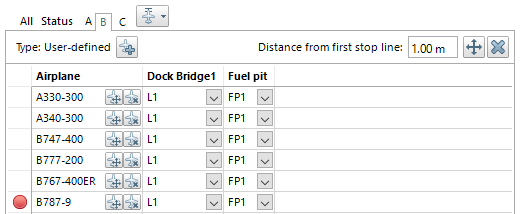
When a stop line tab is selected, the type and position of the stop line are indicated, usually as a distance from the first stop line. Specific actions that can be performed for subject stop line are:
Specific actions that can be performed for an individual airplane or multiple selection of airplanes are:
Useful link: Airplane Parking table