

Change lot names, shift the interior rows in a lot, update a lot or distribute aisle space in a lot.
|
Edit Lot |
|
Click  Edit Lot on the ParkCAD Edit flyout or ParkCAD Edit toolbar if it is not already the current editing tool.
In the drawing, select the lot you want to shift.
In the Edit Lot dialog box, click  Shift Lot.
Move the mouse in the direction of the arrows then click to accept the change or, click the Shift Distance toggle, type a value in the edit box then click Apply. The Information dialog box will update to show the Row Angle and Stall Count dynamically.
Repeat steps 2 to 4 or right-click to end this tool.
Hint: The positive shift direction is determined by the start and end point of the interior rows. To determine the positive direction of shift, move the mouse and watch the Shift Distance value update dynamically in the Edit Lot dialog box.
The following figures illustrate the effects of using Shift Lot:
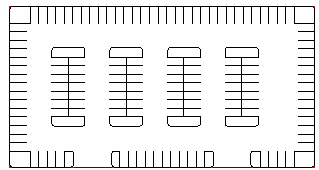
Example of lot before Shifting
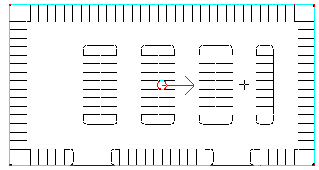
Example of Shifting to one side of the lot
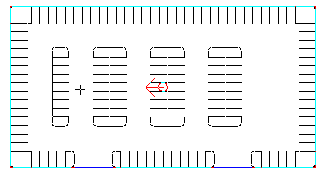
Example of Shifting to the other side of the lot
This tool is used to update a ParkCAD lot to conform to changes in the drafted lot boundary with respect to physical lines, access lines, entrance lines, and exclusions.
Click  Edit Lot on the ParkCAD Edit flyout or ParkCAD Edit toolbar if it is not already the current editing tool.
In the drawing, select the lot that you want to update. The Information dialog box will update to show the Row Angle and Stall Count.
In the Edit Lot dialog box, click  Update Lot. The Information dialog box will update to show the Row Angle and Stall Count.
Repeat steps 2 and 3 or right-click to end this tool.
The following drawings illustrate manipulating the CAD drawn boundary and then using Update Lot:
|
Simple Physical Boundary |
ParkCAD created Lot in simple boundary |
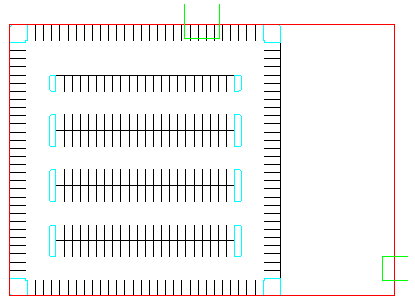
Boundary elements changed and added to reflect design requirement changes
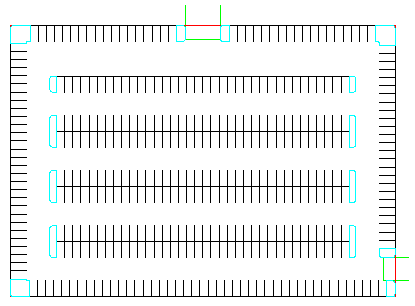
Lot after Update Lot
This tool is used to distribute the excess aisle width evenly across all of the aisles in the lot. The aisle widths can never be less than the dimensions cited in the standard layouts (see Design Parameters -> Standard Layouts) therefore this tool divides the excess aisle width dimension by the number of aisles in the lot then increases each aisle width by that amount.
Click  Edit Lot on the ParkCAD Edit flyout or ParkCAD Edit toolbar if it is not already the current editing tool.
In the drawing, select the lot that you want to edit. The Information dialog box will update to show the Row Angle and Stall Count.
In the Edit Lot dialog box, click  Distribute Aisle Space. The Information dialog box will update to show the Row Angle and Stall Count.
The interior rows will shift such that each perimeter aisle and interior aisle are adjusted by the same amount.
Repeat steps 2 to 4 or right-click to end this tool.
The following drawings illustrate the effect of using Distribute Aisle Space in a lot where the aisle width values are the same for the perimeter and interior stall layouts (see Design Parameters - Parking Standards):
|
ParkCAD Created Lot - based on the current Parking Standards. Note the excess Aisle Width at the top of the Lot. |
The Perimeter and Interior Aisle Widths have increased by the same amount. |
The following drawings illustrate the effect of using Distribute Aisle Space in a lot where the aisle width values are not the same for the perimeter and interior stall layouts (see Design Parameters -> Parking Standards):
|
ParkCAD Created Lot - based on the current Parking Standards. Note the excess Aisle Width at the top of the Lot. |
The Perimeter and Interior Aisle Widths have increased by the same amount. |
This tool is used to distribute the excess aisle width into center paths in the lot. The aisle widths can never be less than the dimensions cited in the standard layouts (see Design Parameters -> Standard Layouts) however, the aisle space in one or more areas of the lot may exceed the specifications. This tool allows the user to decide how to distribute the excess aisle width into user selected rows to make use of the excess aisle space.
Click  Edit Lot on the ParkCAD Edit flyout or ParkCAD Edit toolbar if it is not already the current editing tool.
In the drawing, select the lot that you want to edit. The Information dialog box will update to show the Row Angle and Stall Count.
In the Edit Lot dialog box, click  Distribute Center Paths. The following dialog box displays:
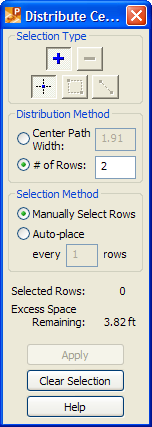
Distribute Center Paths
The Distribute Center Path dialog box initially displays the Center Path Width that can be applied to all of the eligible interior rows in the lot. Note that only double sided rows can have center paths applied to them.
In the Distribution Method section, select either Center Path Width or # of Rows to determine the how the excess aisle space will be distributed in the interior rows of the lot.
Center Path Width: Set the Center Path Width value then Tab off of the edit box to see the # of Rows box update with the new maximum number of interior rows that can be selected to use up the excess space in the lot.
# of Rows: Set the # of Rows to a value less than the default value then Tab off of the edit box and note the new Center Path Width value. This is the width of the center paths given the number of rows.
In the Selection Method section, select either Manually Select Rows or Auto-place.
Manually Select Rows: Select rows in the lot until the Selected Rows value reaches the # of Rows value at which point the Selected Rows value will display in a green color. The Excess Space Remaining value may or may not also display in a green color depending on whether or not all of the space is used up. If there is still excess space remaining the Excess Space Remaining label and value will display in blue. If you exceed the number of rows or available excess space the labels and values will display in red.
Auto-place: Type the frequency of the rows to have center paths applied to them in the edit box then move the mouse into the lot. Interior rows will be highlighted in the lot. Move the mouse in the lot until the desired rows are highlighted then click in the lot to select the rows.
(Optional) In the Distribute Center Paths dialog box, click Clear Selection at any time to start the selection process over (repeat steps 5 and 6 as desired)..
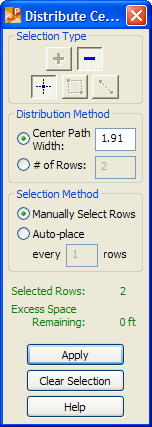
Distribute Center Paths - excess space distributed
In the Distribute Center Paths dialog box, click Apply when the desired rows are highlighted in the lot.
The following drawings illustrate the effect of using Distribute Center Paths in a lot where the aisle width values are the same for the perimeter and interior stall layouts (see Design Parameters - Parking Standards):
|
ParkCAD Created Lot - based on the current Parking Standards. Note the excess aisle space at the top of the Lot. |
The excess aisle space has been distributed into center paths in each of the interior rows. |
This tool is used to reduce the footprint of a selected lot by removing the excess perimeter aisle space.
Note: This tool does not support lots that contain arc boundaries.
Click  Edit Lot on the ParkCAD Edit flyout or ParkCAD Edit toolbar if it is not already the current editing tool.
In the drawing, select the lot that you want to edit. The Information dialog box will update to show the Row Angle and Stall Count.
In the Edit Lot dialog box, click  Minimize Lot Footprint. The following dialog box displays:
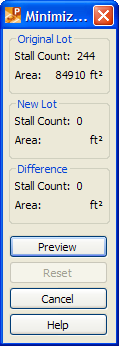
Minimize Lot Footprint
Select the lot sides to determine how the lot will be minimized:
Note: Circles display at the midpoints of all lot boundaries that can be selected. If the boundary has not been selected yet it will be black and change to cyan as the cursor nears it.
In the Minimize Lot Footprint dialog box, click Preview to see the effect of the minimization in the drawing and the results in the Minimize Lot Footprint dialog box. The following dialog box displays:
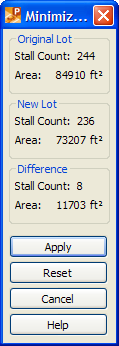
Minimize Lot Footprint
The Minimize Lot Footprint dialog box displays the Stall Count and Area of the Original Lot at the top of the dialog box, the New Lot below that, and the differences between the two lots in the Difference section.
(Optional) Click Reset to return the lot to its previous state and repeat the lot side selection process from step 4.
Click Apply to accept the New Lot as shown in the dialog box and drawing and then return to the Edit Lot dialog box.
The following drawings illustrate the effect of using Minimize Lot Footprint in a lot (see Design Parameters -> Parking Standards):
|
ParkCAD Created Lot - based on the current Parking Standards. Note the excess aisle space at the top of the Lot. |
The lot's footprint has been decreased to the minimum by moving the perimeter row to the parking standard's aisle width away from the last interior row. |
See also: Edit Tools -> Selection Types