
Converts selected stalls to accessible parking stalls of the user's choosing and gives recommendations as to how many accessible stalls are required for selected designs, lots, and/or rows based on the current accessibility standard and stall layout (See Design Parameters -> Accessibility Standards).
Depending on the complexity of your drawing it may be beneficial to set up designs before using the Accessible Parking tool. Accessible Parking will take into account all lots and rows associated with a design when the design symbol is selected. Selecting a design is easier than selecting each lot and/or row that you want to add Accessible Parking to. However, it may also be desirable to select one or more lots and/or rows in addition to one or more designs. See Tools -> Design Manager.
Quick Method (does not take Accessibility Standards requirements into account)
Requirements Method (ensures Accessibility Standards requirements are met)
Prior to using this tool, ensure that the desired Accessibility Standard and Stall Layout settings are chosen in Design Parameters -> Accessibility Standards.
|
Accessible Parking |
|
Prior to using this tool ensure that the desired Accessibility Standard and Stall Layout settings are chosen in Design Parameters -> Accessibility Standards.
Click  Accessible Parking on the ParkCAD toolbar or ribbon.
In the Accessible Parking dialog box, click  Calculate Accessible Parking Requirements. The following dialog boxes display:
|
Select Objects |
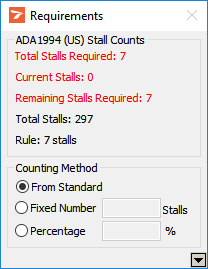
Requirements |
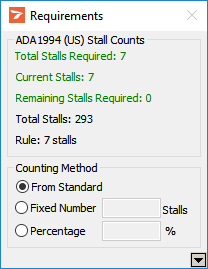
Note: The Requirements dialog box always displays: the number of accessible stalls required to satisfy the current rule (Total Stalls Required); how many accessible stalls are currently in the selected design, lots, and/or rows (Current Stalls); how many accessible stalls still need to be added (Remaining Stalls Required); the total stall count (Total Stalls) and the rule in effect based on the Counting Method and Stall Count.
In the drawing, select the design symbols, lots, and/or rows in which you want to change stalls to accessible parking stalls.
As design symbols, lots, and/or rows are selected, the values will update in the Requirements dialog box as in the following dialog box:

Requirements
In the Select Objects dialog box, click Apply when you have finished selecting design symbols, lots, and/or rows. The following dialog boxes display:
|
Accessible Parking |
Requirements |
In the Accessible Parking dialog box, set the desired Configuration options. See Configuration Options below.
In the drawing, select the stalls that you want to change to accessible parking stalls.
Repeat steps 6 and 7 until the Remaining Stalls Required value reaches zero (0). The Requirements dialog box displays:

Requirements
In the Requirements dialog box, change the Counting Method if desired then repeat step 8.
When finished adding accessible parking stalls, right-click to end this tool.
Click  Accessible Parking on the ParkCAD toolbar or ribbon.
In the Accessible Parking dialog box, click  Remove Accessible Stalls.
In the drawing, select accessible stalls to convert back to standard stalls (they will be converted based on the perimeter or interior layout of the current parking standard depending on whether the row the stalls are located in are perimeter or interior rows).
Repeat step 3 or right-click to end this tool.
Note: After removing accessible parking stalls it is recommended that the Requirements Method for adding accessible parking stalls be followed to ensure that the accessibility requirements have been met.
|
|
Access Aisle Position |
Click this button to select the desired position for the accessibility stall's accompanying access aisle.
The three positions are:
|
|
|
The accessibility standard can only be set in Design Parameters -> Accessibility Standards.
The stall layout can be set to any layout that is associated with the current accessibility standard.
The total width of the accessible stall and access aisle is displayed here.