GuideSIGN Plus 2024 Help
This feature is not available in GuideSIGN.
Allows various reports to be generated and saved to files. This tool can be used to report on various information about the sign assemblies in the sign plan drawing by automatically selecting them based on their relationship to reference elements or by selecting them manually. The Report Manager tool includes several reports and also allows you to create your own reports.
Click ![]() Report Manager on the GuideSIGN Plus toolbar or ribbon. A dialog box similar to the following example displays (for detailed information on the dialog box, see Tools -> Report Manager):
Report Manager on the GuideSIGN Plus toolbar or ribbon. A dialog box similar to the following example displays (for detailed information on the dialog box, see Tools -> Report Manager):
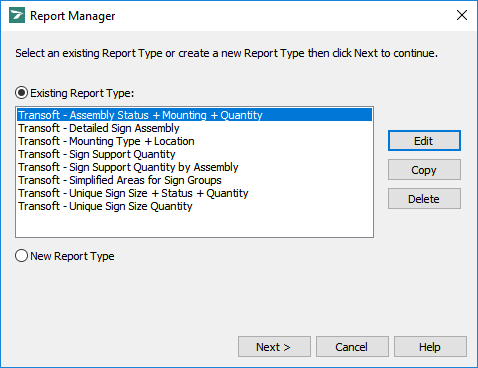
Report Manager
Select an existing report type and, if necessary, edit it, or create a new report type.
To use an existing report type, click Existing Report Type, then click the desired report type in the list, and then click Next.
To view/edit an existing report type, click Existing Report Type, then click the desired report type in the list, and then click Edit. The Report Options dialog box displays (for detailed information on the dialog box, see Tools -> Report Manager -> Report Options). For information on setting the report options, see Editing a Report Type. After you set the report options, click OK to return to the Report Manager dialog box, and then click Next.
A dialog box similar to the following example displays (for detailed information on the dialog box, see Tools -> Report Manager -> Sign Assembly Selection Method):
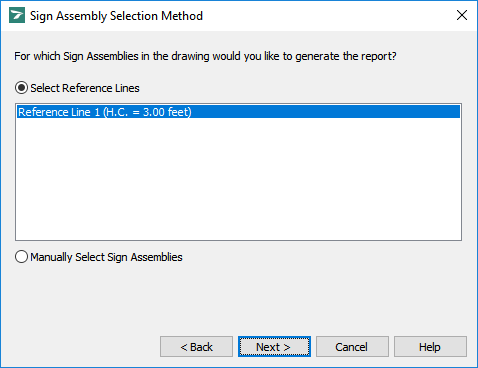
Sign Assembly Selection Method
Choose how you want to select sign assemblies for the report.
To generate a report for one or more sign assemblies placed relative to one or more reference lines, click Select Reference Lines, then click the desired reference lines in the list, and then click Next.
To manually select one or more sign assemblies in the sign plan drawing click Manually Select Sign Assemblies, click Next, then pick the sign assemblies for which you want a report to be generated, and then click a blank area in the drawing.
A dialog box similar to the following example displays (for detailed information on the dialog box, see Tools -> Report Manager -> Select Filters):

Select Filters
To specify the status of the sign assemblies that will be included in the report, select the check boxes preceding the names of the desired filters.
To specify the sign support type of the sign assemblies that will be included in the report, select the check boxes preceding the names of the desired filters.
Note: Sign support type filters are secondary in relation to sign assembly status filters (i.e. the selected sign support type filters will be applied only to the sign assemblies that have the statuses selected for the report).
(Optional) If you selected a reference line in the Sign Assembly Selection Method dialog box at step 3, you can have the report generated for a reference line segment located between two distances rather than for the entire reference line. To specify the reference line segment for the report, select the Between Two Distances check box, and then type the desired distance length values in the First Distance and Last Distance boxes.
You can also choose the side(s) of the reference line for which the report will be generated. To have the report generated for both sides of the reference line, for the left side, or for the right side, click Both, Left, or Right accordingly.
Note: Reference line filters are tertiary in relation to sign assembly status and sign support type filters (i.e. the selected reference line filters will be applied only to the sign assemblies that have the statuses and sign support types selected for the report).
After you select filters for the report, click Next. A dialog similar to the following example displays (for detailed information on the dialog box, see Tools -> Report Manager -> Report Preview):
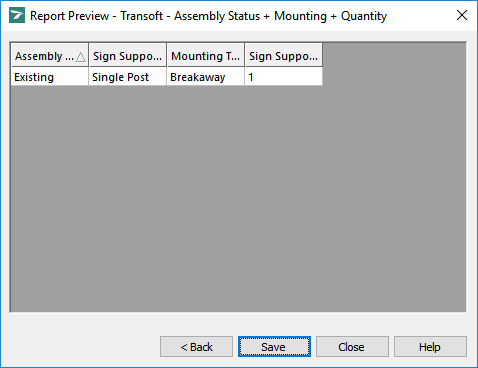
Report Preview
To save the report, click Save. A dialog similar to the following example displays:
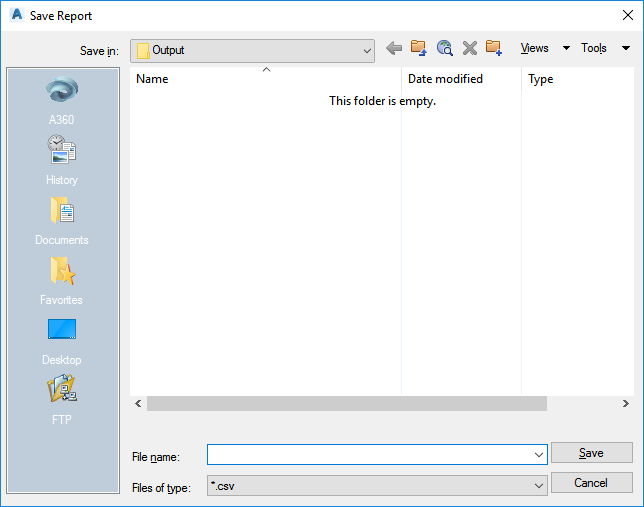
Save Report
In the File name box, specify a name for the report .csv file, and then click Save.
The report will be saved as a .csv comma delimited file which can be opened and/or edited in any spreadsheet or text editor (e.g. Microsoft® Excel or Microsoft® Notepad).