GuideSIGN Plus 2024 Help
This feature is not available in GuideSIGN SIGMA.
Allows you to create a sign template based on an existing guide sign.
Before creating and saving custom templates, see Creating Signs for Templates Tips and Template Creation Tips.
For information on the location of user created sign templates, see Customizing GuideSIGN Plus -> Saving User Created Content.
Note:
Displays the current panel style, the units which the software uses to match the drawing's units, and the M.U.T.C.D. Edition.
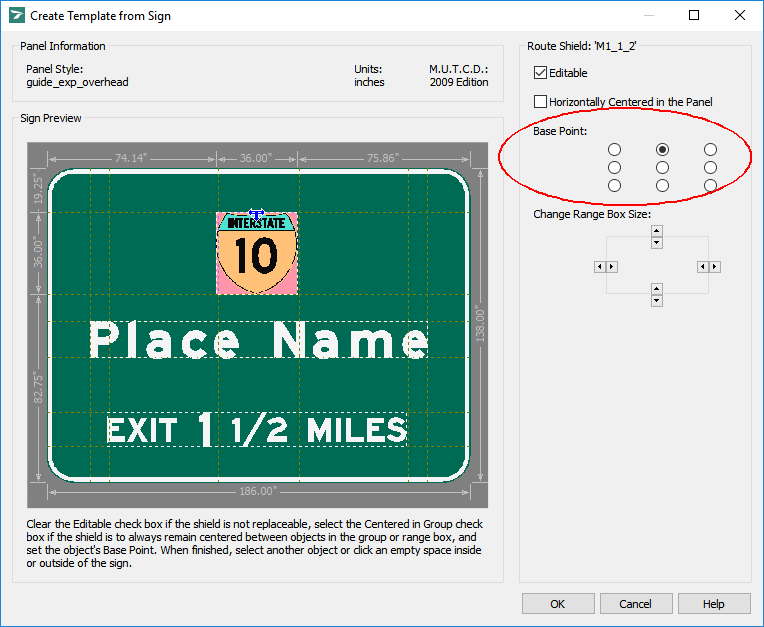
Displays the preview of the guide sign to be used for a new template. The pointer will change shape as you move it over the sign preview to help you select a sign element. As you select an element, the parameters available at the right of Sign Preview will change accordingly. As you modify the template parameters, the preview will update dynamically.
Select each element to display and modify it's settings as required. Ensure that the positioning of the elements in the sign preview is similar to that in the original sign, and that the base point arrow of each element indicates the desired direction in which the element's range box may grow when a sign is created from the template.
To specify the road classification and sign type for the template, click the arrow to the right, and then click the desired category in the list or type a new category name.
Road Classification and Sign Type categories are organized based on the M.U.T.C.D. highway signing classification (see Appendix -> Templates Classification). You can use this structure for storing the sign templates that you create with the Create Template from Sign tool. However, you can add your own Road Classification and Sign Type categories and use them along with the ones that were shipped with the software.
Lets you specify a name for the template.
Allows you to specify a fixed panel width and height. By default, these settings can be modified when the template is used to create a new sign (see Create Sign from Template). If you want to fix the Width and/or Height values so the user cannot modify them when creating a sign based on the template, select the corresponding Lock check boxes. Selecting a Lock check box lets you specify the panel width and/or height by typing the desired value in the Width and/or Height box.
To have the sign elements aligned evenly along the left and right margins, select the Horizontally Justified check box.
Note: For the software to be able to horizontally justify text strings, you must fix the text strings at the same length as you create a sign for a template (see Place Highway Text and Creating Signs for Templates Tips). It is also important to adjust the word gap minimum width appropriately (see Create Template from Sign -> Word Gap Settings).
Makes the objects in a sign shift towards the selected margin position (see Place New Panel - Advanced). You can select one of the nine options available to modify the margin shift within the sign.
Note: If you select the Horizontally Justified check box, the left and right side Shift Margin options will be unavailable, and you will be able to shift the margin only to the top center, bottom center, or center position.
Allows you to type the description of the current sign (i.e. the suggested use, the reference source, and the sizes and fonts (letter series) for the major text).
The steps to create a sign to be used as the basis of a template are generally the same as those for creating signs (see Using Sign Creation Features -> Creating a Sign: Basic Steps for Creating a Sign).
To ensure that your template behaves as desired, consider the following points when creating the sign:
When a template is created from a sign, the panel size is recalculated based on applying the sign's panel style. If you have placed objects that encroach on the margins and the size is not locked, the panel will increase in size to accommodate the margin calculations. To ensure the template system will accurately create the desired templates and thus subsequent signs, ensure that the panel style has appropriately sized margins (see Panel Styles' Margins Category).
It is usually a good idea to work with the Auto update panel setting turned on (see Program Settings' Locks - Design Category). This ensures that the sign will behave as desired when a template is created from the sign. Ensure that the objects do not encroach on the margins if you did not use auto panel updating while creating the sign.
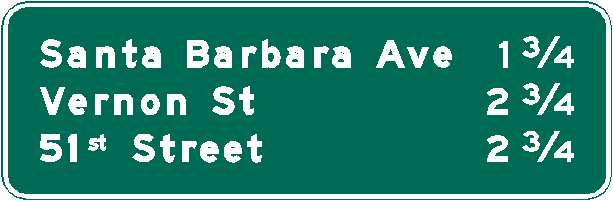
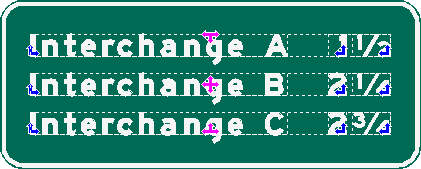
Distance Sign Created for a Template
The number and ordinal ending in street name signs must be created as a text string with two components. Remember to select the Number-Ordinal Ending text style in the Text Style box when placing the text in the street name sign.
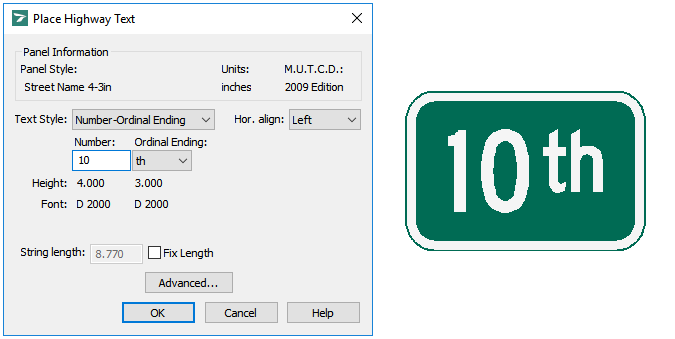
Number-Ordinal Ending in a Street Name Sign
To ensure that your template behaves as desired, please consider the following points when creating the template:
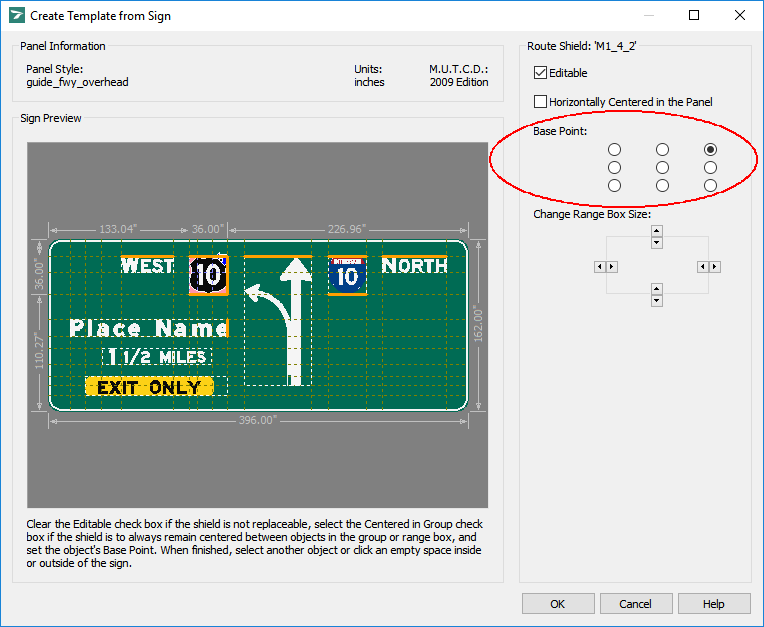
Route shield element base point aligned to object
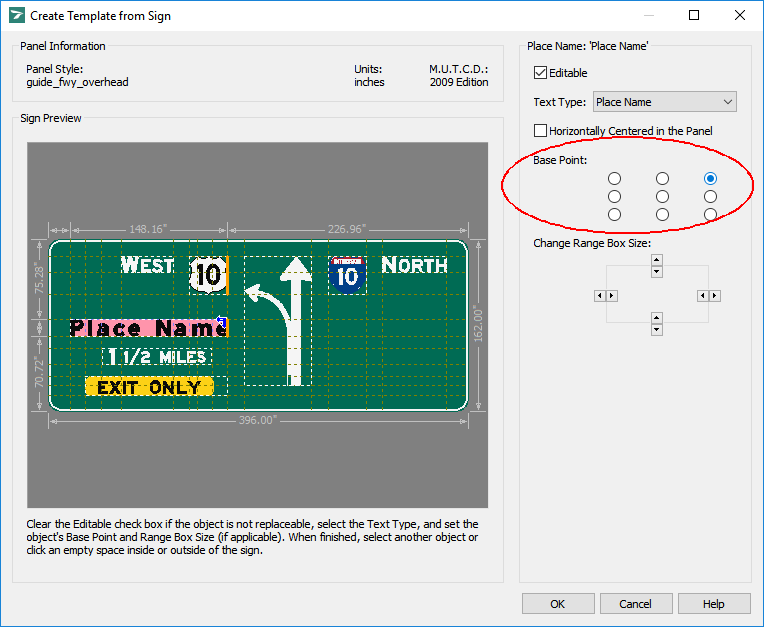
Place name element base point
Centered element base point
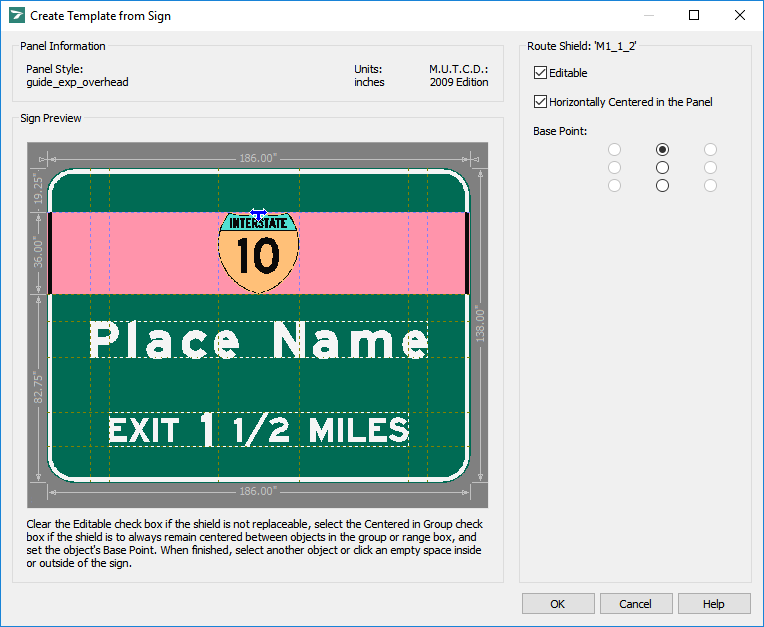
Route shield element centered in the sign
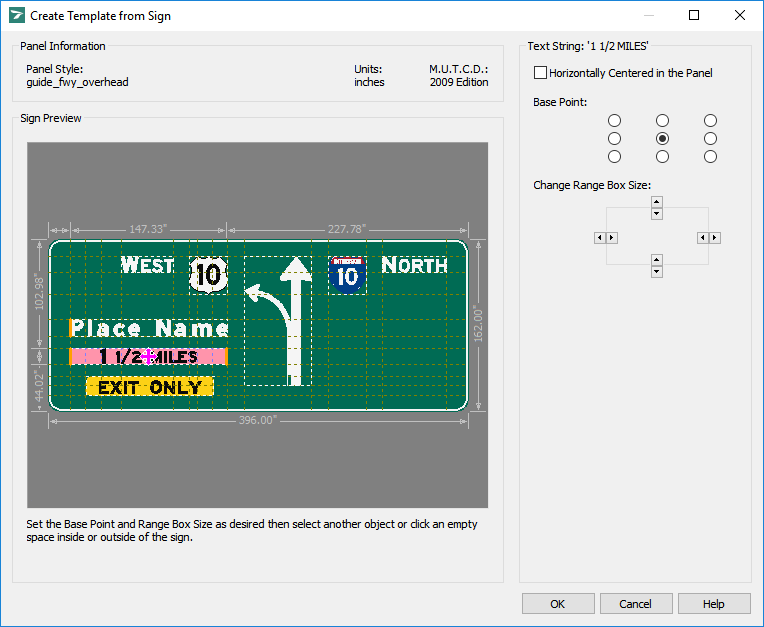
Exit distance text string aligned to place name
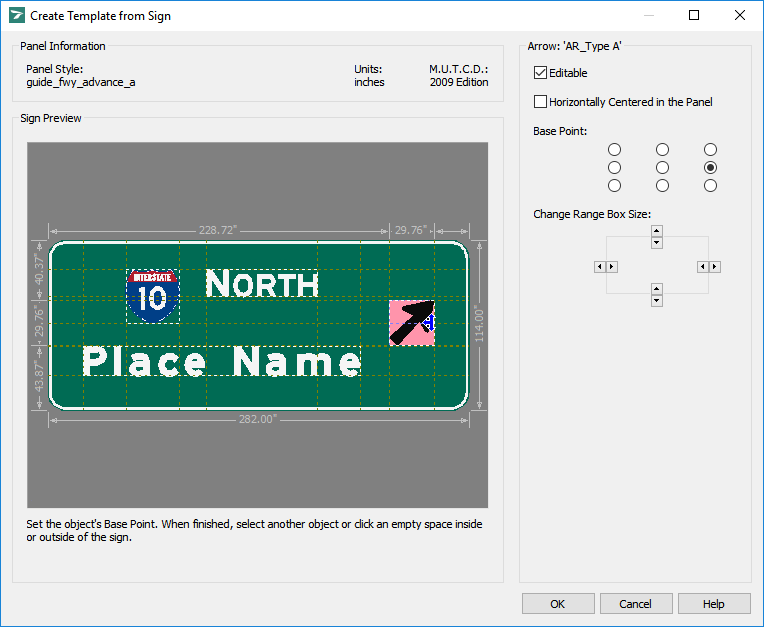
Vertically center the arrow to group and place name
Note: The horizontal and vertical orange bars that appear on the sides of the range boxes denote how the range box is aligned with other element range boxes.
Number element base points