GuideSIGN Markings 2024.8.2

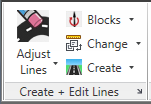

This routine enables you to remove just one, or more, of the dashes from within an existing line plus gap road marking, e.g., to insert a diag. 1014 arrow in a centre line.
The routine can also be used to delete a single mark at the end of a line of marks, i.e., to shorten a road marking by one module in length.

The Add a Module command is almost the reverse of the above delete marks command. It allows you to select one end of a road marking (dashed linetype) and will add an extra module (line plus gap) to that end of the marking.
If the end part is an arc, it will continue the arc around the same radius and in the same arced direction.
A second marking can be added just by picking the end a second time.
This command accurately draws the individual dashes in a dashed (line plus gap) road marking. It does this by replacing the one dashed line with tens or hundreds of short lines the exact length of the line part of the line+gap, e.g, if it is a 4 + 2 linetype, then the result will be many 4 long lines with gaps of 2 in between the short dashes.
This utility is provided to help display intermittent lines when using 3D shading and plotting with differing linetype scales. The limitations and settings of many CAD systems mean that dashed linetypes are displayed and printed as continuous or longer dashes. Applying this command to the lines, forces the CAD system to draw and shade each individual segment separately.
This utility also overcomes any CAD inaccuracies that affect drawing long lengths of arced polylines with a dashed line. It isn’t needed in most situations and clearly would take more PC resources if it was applied to all dashed linetypes.
This tool swaps the starts and end of a line, arc or polyline. This can be useful for older CAD linetypes with text in them, when the text letters are all drawn upside down.
Within GuideSIGN Markings, sometimes you may find that the parking bays or other markings are drawn on the wrong side of the curbline. Quickly applying a reverse to this type of marking should swap the start of end of the bays around so that they are now drawn on the other side.
This tool breaks the polyline at the chosen point. It places a little marker at the break for identification. This is useful if, for example, you wished to use only a certain length of curb/kerb-line for offset double yellow or curb/kerb markings
This will step down a polyline placing a marker at each specified interval. This is useful if, for example, you have broken a center/centre-line as above, but wish to change to a different mark after a specified distance, or wish to mark where arrows would go, say, every 30 metres. The user has the opportunity to step forward or backwards through the intervals, or break the polyline so that separate offset routines can be run with different options.
This reverses the procedure of breaking the polylines described above. It simply re-joins the polyline, erasing the break marker.
This command is virtually the same as using the red grip on blocks and text to alter the angle of the symbol. This command operates directly on the un-highlighted and block has an advantage of working on the next block and the next block, until to finish.

This procedure removes the colored area from symbol block and leaves just the outline of the symbol. This might be useful in certain drawings where you want to show a site clearance arrow in a different way to a new arrow marking.