GuideSIGN Plus 2024 Help
This feature is not available in GuideSIGN SIGMA.
Allows you to place a new panel.
Note: All panel data set in the Place New Panel dialog box (except sign divider data) can later be changed using the Update Existing Panel tool.
Displays the current panel style, the units that the software uses to match the drawing's units, and the M.U.T.C.D. Edition.
Note: If you want to change the units and/or M.U.T.C.D. Edition, click  Program Settings on the GuideSIGN toolbar or ribbon (see Program Settings' General - Design Category).
Click this button to change the panel style. (see Panel Styles' Select Current Panel Style).
Specify information such as the sign name, quantity, station(s), mounting type, legend, and panel material type. This data is stored with the sign panel and can be included in reports. Any data that will not be included in a report or exported to a file can be left at the default values.
Note: Station information can be specified in this dialog box with multiple stations separated by commas - alternatively, click Advanced, and then enter each station individually in the Stations section (see Place New Panel - Advanced).
Specify the initial width and height for the panel. For all panel shapes except diamond shapes, the values of the initial dimensions are not critical because the panel will be resized as text, and symbols are added to the sign. In most cases, the default dimensions displayed when the dialog box appears can be used to create the panel.
Determines what increment is used to round up panel dimensions. For example, if Round is set to 6 (in imperial units), the panel dimension would be rounded up to the nearest 6 inches.
Makes the panel width and/or height to be forced to the specified values. As long as either the width or the height of the objects placed in the sign does not exceed the locked values, the dimension will remain at the locked values throughout any subsequent panel updates.
Diamond shaped signs do not resize when objects are placed in them - they remain fixed at the size you specify in this dialog box.
Angled and chevron shaped panels require an interior angle in degrees for the pointed corner.
Select either Rounded Corners or Squared Corners in the list to specify whether the corners of the panel will be rounded off or squared respectively. Applies to rectangular and diamond shapes.
Dividers are horizontal or vertical lines that subdivide a sign into sub-panels. Select up to three divider lines to subdivide a sign panel into as many as four sub-panels. The colors of each sub-panel can be independently set by editing the Panel Colors in the panel style (see Panel Styles' Panel Category). Panel Colors 1 to 4 set the colors for each subdivided section, starting with the lowest section (for horizontal dividers) or the left section (for vertical dividers).
The illustrations below show a sign panel with 1 vertical divider and one with 1 horizontal divider.

Vertical Border Example
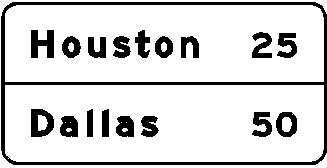
Horizontal Border Example
Initial objects should be placed in each sub-panel with snap set to Snap Off (see Place Short Line). When the panel is updated, the positions of the objects will be adjusted independently in each sub-panel, as if they are separate sign panels.
To create lines that do not extend the full width or height of a sign, use the Place Short Line tool.
Select either Rounded Dividers or Squared Dividers in the list to specify whether the dividers will be squared or rounded off respectively where they intersect the border. This setting is only available for the rectangle panel shape.
The panel anchor is the origin of the sign panel. This is the point about which any subsequent panel updates will be done. For example, if the panel anchor point is set to the center of the panel, the center of the new panel will remain at that point after an update. This is useful for making sure a sign stays in the correct location in a drawing containing more than one sign.
The panel anchor also serves as the insertion point (i.e. origin) for sheets and reports. For example, if the lower-left button is selected, when a sheet or report is later inserted for the sign, it will be located with its origin at the lower-left corner of the sign panel.
Hint: For most situations, use the center/center position.
For information on the Advanced parameters, see Place New Panel - Advanced.